Cubric Vision - Image Tools

Image Tools

Image operations for masking, painting, compositing, cropping, resizing, upscaling, and refining still assets from History.

Tool palette

The image tool palette is the rail down the left of the History workspace. Tools are stacked into labelled groups, and the group tells you what the tool produces:

  • Prompt — the Prompt Box and its operations.
  • Transform — Crop and Resize.
  • Enhance — Upscale and Remove Background.
  • Mask — Brush, Detect, Shapes, and Adjust. Everything that makes a mask.
  • Paint — Paint, Shapes, and Adjust. Real colour on the picture itself.
  • Composite — Paint Comp and Mask Comp. Blending two of your images.

The Prompt Box stays open in the Mask and Paint groups, because a mask or a scribble and a prompt are one operation. The Composite group hides it: it ends at its own Apply and needs the column for its slots.

Image tools are non-destructive. Applying crop, resize, upscale, paint, a composite, or a prompt operation creates a new History entry so the original entry remains available.

Mask tools

Use a mask when a prompt operation should affect only part of the image. Everything that makes one now sits in the Mask group in the tool rail, and the four buttons all write into the same mask, so you can mix them freely:

  • Brush. Paint the mask by hand, with ten brushes to choose from.
  • Detect. Find it instead of drawing it — by clicking, by name, or automatically.
  • Shapes. Drop a rectangle, triangle, or ellipse and commit it.
  • Adjust. Grow, shrink, or reduce a mask you already have — and fill its holes.

None of it runs a model or downloads anything, apart from the detection methods noted below. It is all instant and all undoable.

After a mask is ready, pick an operation such as Detail from the operation strip above the prompt box. The active mask is passed into the operation when the selected model supports mask-based work. The prompt box stays open while you mask, so you can change a setting without leaving the tool.
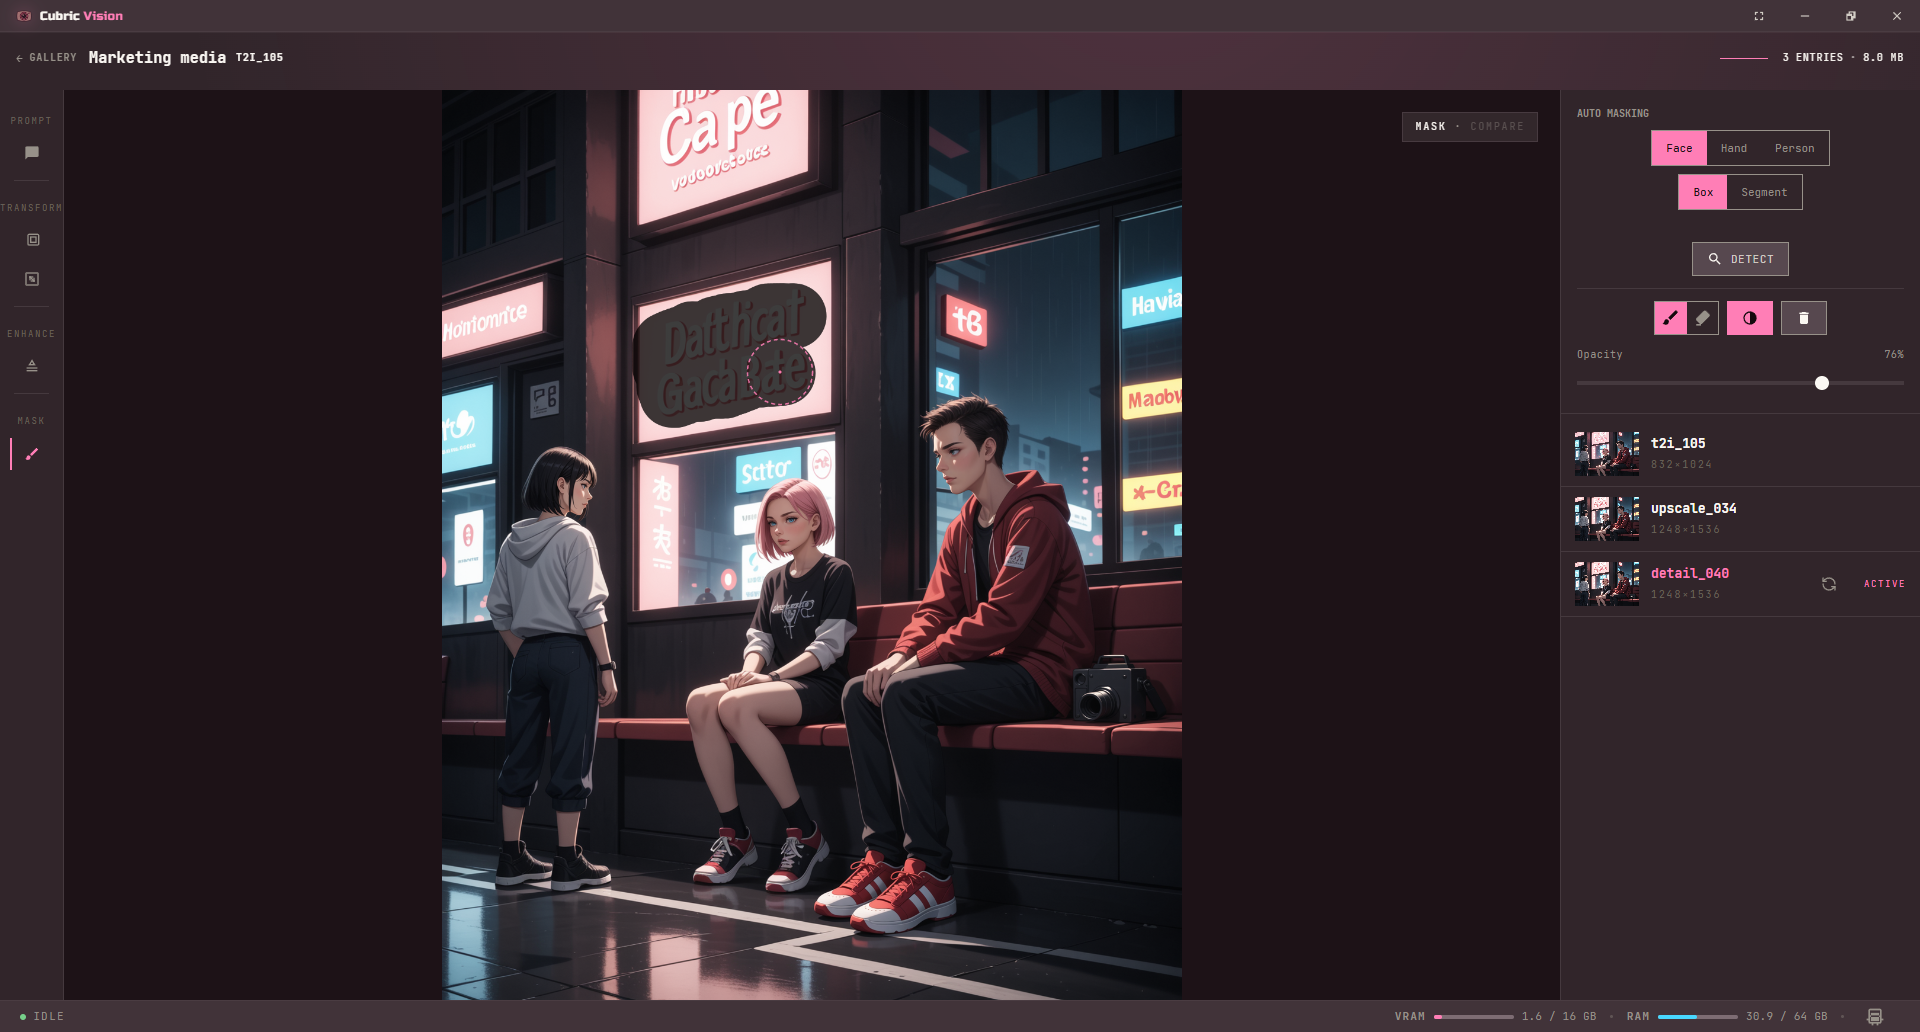
To erase what you masked, use Inpaint with an empty prompt.

Brush

Paint the mask by hand. Switch between paint and erase in the options panel or with B and E, and set the brush size with the mouse wheel.

The brush is a pack of ten presets: Hard Round, Soft Round, Feather, Airbrush, Chisel, Calligraphy, Spray, Charcoal, Stipple, and Dry Brush. They resample to any brush size, and the same ten are available in the Paint group. Strokes stay continuous however fast you drag.

Shapes

Drop a rectangle, triangle, or ellipse on the canvas, position it, then commit it with Add or Subtract.

  • Drag the shape to move it, or its handles to resize it.
  • Hold Shift while resizing to keep its proportions.
  • Hold Alt over a handle to rotate it.

The shape stays where you put it after you commit, so stamping the same ellipse three times is three drags rather than three set-ups. An uncommitted shape is a preview: leave the tool and it goes away.

Adjust

Adjust works over a mask you already have, which is why it sits at the bottom of the group — make the mask, then adjust it. Pick a mode, drag the slider, watch the live preview, then press Apply. Reset abandons it, and so does leaving the tool.

  • Grow. Push the whole mask outward.
  • Shrink. Pull it inward. The same slider row, running the other way.
  • Edge. Reduce the mask to a band around its own edge, set independently inward and outward.

The edge band is the one to reach for when a subject came out right but its outline did not: it lets you regenerate the boundary without touching the middle.

Fill sits in the same panel and closes enclosed holes in one press — the inside of a ring, the gap in a letter. You see what is about to be filled before you commit to it.

Detect

Detect is one rail button that opens three methods in a small strip beside it. All three end the same way: the result is drawn green as a preview, and you commit it with Add or Subtract.

  • Points. Click what you want and the mask snaps to it.
  • Text. Type what you want masked instead of pointing at it.
  • Auto. The face, hand, and person finder.

One detection finds every match in a single pass, so picking a result — or changing your mind and picking another — does not run it again. Trying all of them costs what one used to.

While a detection runs, the status bar reports it with a timer and the Detect button becomes Stop. A slow pass over a busy image is not a frozen app, and you can call it off.

Points and Text run on a shared detection model of about 1.75 GB, fetched once. Auto uses its own smaller finders. Press Esc to close the method strip.

A green preview is not a mask yet

A detection you have not added is only a proposal. Leaving the tool discards it, and generating without pressing Add no longer sends it — which it silently used to. That is also why operations needing a mask stay unavailable until you press Add or Subtract.

Points

Left-click what you want and the mask snaps to whatever you clicked — a face, a pair of headphones, the cup on the table. Right-click what to leave out when the selection grabs something by mistake. Click a dot again to remove it, or use Clear points to start over.

Dots are cumulative, but they describe one region per run. Click, hit Add, then start on the next part.

Cubric Vision Points mask tool: left-click and right-click dots placed on a dog's collar, the mask snapped to the collar and drawn green, with Clear points, Detect, and Add or Subtract in the options panel
Points snaps the mask to whatever you click. Green marks a region a detector found, so you can tell it from one you painted by hand.

Text

Type what you want masked instead of pointing at it — hair, cup, earring, bikini. Separate several objects with commas, and set the count for how many of each to find; a name with no count returns exactly one.

Every match comes back as its own thumbnail, so you pick which ones become the mask before committing with Add or Subtract.

Points and Text cover each other's weak spots. Clicking is precise, but thin strappy things — a strap, a handle, a chain — want more dots than you would expect, especially right-clicks to push the selection back. Naming the object handles those in one press.

Cubric Vision Text detection with head typed into the name field and a count of 2, two numbered thumbnail candidates returned, and both heads masked green in the image
Text finds the object by description. The count says how many to look for — here two heads — and each match comes back as its own thumbnail to pick from.

Auto

Auto finds faces, people, or hands with no input from you. Choose whether detected areas should be drawn as boxes or as segments that trace the subject more closely, pick the candidates you want, then commit with Add or Subtract. In the example below, three faces were detected and two were selected.
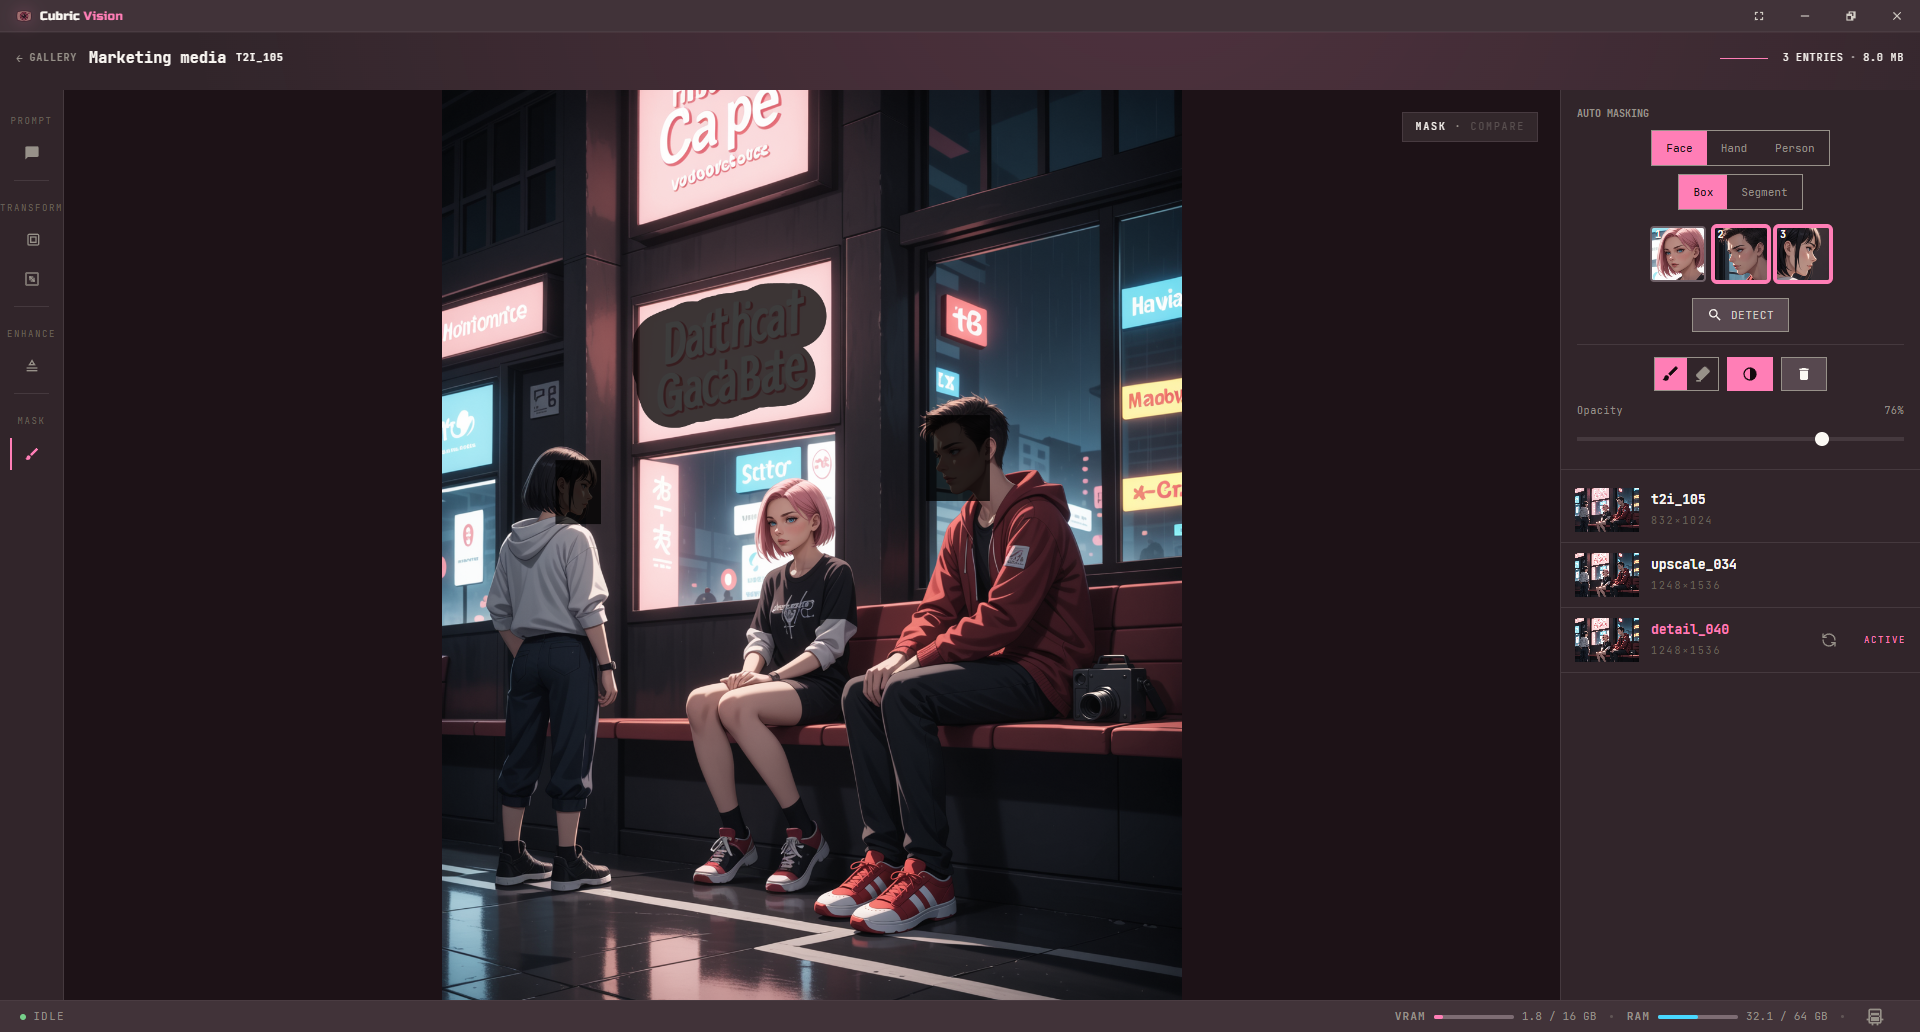
Image Mask tool auto-detect panel showing three detected faces with two selected and box or segment mask options
Auto is useful when you want a fast face, person, or hand mask without painting the full region yourself.

Checking and undoing a mask

The mask options panel carries a black-and-white view that shows the mask exactly as the model receives it. It is the quickest way to catch stray specks before you generate. The same panel holds paint and erase, the brush picker, opacity, invert, and clear.

Cubric Vision mask black-and-white view showing the painted mask as white strokes on a black field, with the black-and-white toggle active in the mask options panel
The black-and-white view shows the mask as the model receives it — white is the area that will be regenerated.

Every canvas edit can be taken back with Ctrl+Z — a brush stroke, a Clear, a committed detection, an applied Adjust — and put back with Ctrl+Shift+Z. One history covers the mask and paint layers together, in the order you worked. It follows you between tools and starts fresh when you open a different image. Nothing else in the app has an undo; see Hotkeys.

Your mask reaches the model as you drew it

A masked operation used to close every hole in your mask and grow it slightly before generating, so a mask drawn as a ring around a subject arrived at the model as a solid blob. That no longer happens on any model, or in a composite: the shape you drew is the shape that is used. If you want a hole closed, press Fill in the Adjust panel, where you can see it happen.

Moving a mask around

Right-click a History entry for Copy mask, Paste mask, and Download mask. Paint and eraser strokes are carried separately, and Cubric warns if the two entries are different shapes.

Right-click the image for Clear mask, Convert mask to paint, Convert paint to mask, and Send to Composite. The two conversions are copies: the layer you converted from survives untouched, and what is already on the destination is kept.

Paint

The Paint group puts real colour on the picture. A rough scribble tells a model where, how big, and what colour — three things a prompt on its own cannot say. Paint a shape, mask it, run Detail over it, and the model works from your sketch instead of guessing.

The group has the same three buttons as Mask, pointed at the paint layer instead:

  • Paint. A brush, an eraser, and a colour picker, with the same ten brushes the mask has.
  • Shapes. The same rectangle, triangle, and ellipse, committed here as Fill or Erase in the colour you picked.
  • Adjust. Grow, shrink, or reduce your paint to a band around its edge.

Adjust on paint is how you outline something. Grow a scribble and the new edge is filled in your current colour while what you already painted is left alone; shrink it and the edge is eaten inward with every surviving brushstroke keeping its own colour; reduce it to a band and the scribble becomes its own outline.

Your paint stays on the image while you switch to the mask tools — that switch is the point of the feature — and it is kept per image until you close the app. Undo covers it like anything else on the canvas.

Press Apply to bake the paint in as a new History entry. The original is untouched, so deleting the new entry undoes it. The opacity slider is what gets baked, so the new entry matches what you saw.

Composite tools

The Composite group blends two of your images and lets you watch it happen. Use it when a re-run fixed one part of a picture and ruined another.

  1. Open the image you want underneath, right-click it, and choose Send to Composite.
  2. Open the image you want on top and pick a Composite tool.
  3. Make the cut, then press Apply.

The selected image is always the one on top, so there is no direction to decide.

  • Paint Comp. Erase the top image and the one underneath shows through live where you erase. The brush paints the top one back, so the two are the reveal and its undo.
  • Mask Comp. Makes the same cut in one step from the mask already on the image. Everything the mask tools can select — brush, detect, points, text, shapes, adjust — can therefore drive a blend.

Both tools open on the eraser, because revealing is the reason they exist. There is no opacity slider here: a composite is a hard cut, and a ghosted preview would disagree with the file that gets written.

Two images of different sizes are cropped to fill rather than stretched, and the preview on the canvas matches the file that gets written. Apply lands the blend as a new entry at full resolution; both originals are untouched.

Localised edit

Mask an area before running an edit and only that area is regenerated — at the picture's own resolution.

A whole-image edit has to shrink your picture to the size the model works at. A masked edit crops to the mask instead, edits that crop, and stitches it back, so the picture keeps its original pixels and everything outside the mask is untouched.

It rewards a precise mask. For a broad change like a new pose, leave the mask off and let the model rework the whole image.

Available on Krea 2, FLUX.2 Klein, Qwen Image Edit, and Boogu Image Edit.

Inpaint

Inpaint regenerates the area you masked. Like any operation, it appears in the operation strip on models that support it — check the model reference for which ones do.

The model cannot see what is under your mask. It generates that area from scratch, using only the pixels around it for context. What you type decides between the two things it can do:

  • Empty prompt — erase. The masked object is removed and the area is filled in from its surroundings.
  • Any text — replace. The masked area becomes what you described. Type hat and you get a hat.

Never write an instruction to delete something. The model reads your words as things to draw, so "remove the tattoo" risks painting a tattoo. An empty prompt is how you erase.

For a plain erase, leave the style on None: styles apply to the patch rather than the picture, so the fill should match its surroundings.

If you outlined the object rather than filling it in, press Fill in the Adjust panel first. Masks are no longer closed for you behind the scenes — what you drew is what the model receives.

Cubric Vision with a brush mask drawn as a white outline around a cat lying on a rug, and inpaint available in the operation strip
Before: the object is masked. An outline like this one needs Fill before it is a solid mask.
The same image after running inpaint with an empty prompt: the cat is gone and the rug and floor behind it have been filled in
After: Inpaint with an empty prompt, and the cat is gone — the rug behind it filled in from its surroundings. The example uses FLUX.2 Klein.

Crop tool

Use Crop to define a new image frame. Choose Free to drag the crop handles unconstrained, Ratio to lock to a preset, or Resolution to type an exact output size. The ratio set includes model-friendly formats such as SDXL and Flux, social media formats, and cinema formats (2:1, 1.85:1, 21:9, 2.39:1).

A Divisible by control keeps the crop dimensions on a clean multiple (default 16), which most models prefer. Resize also defaults to 16. Applying the crop creates a new image entry based on the selected crop area.
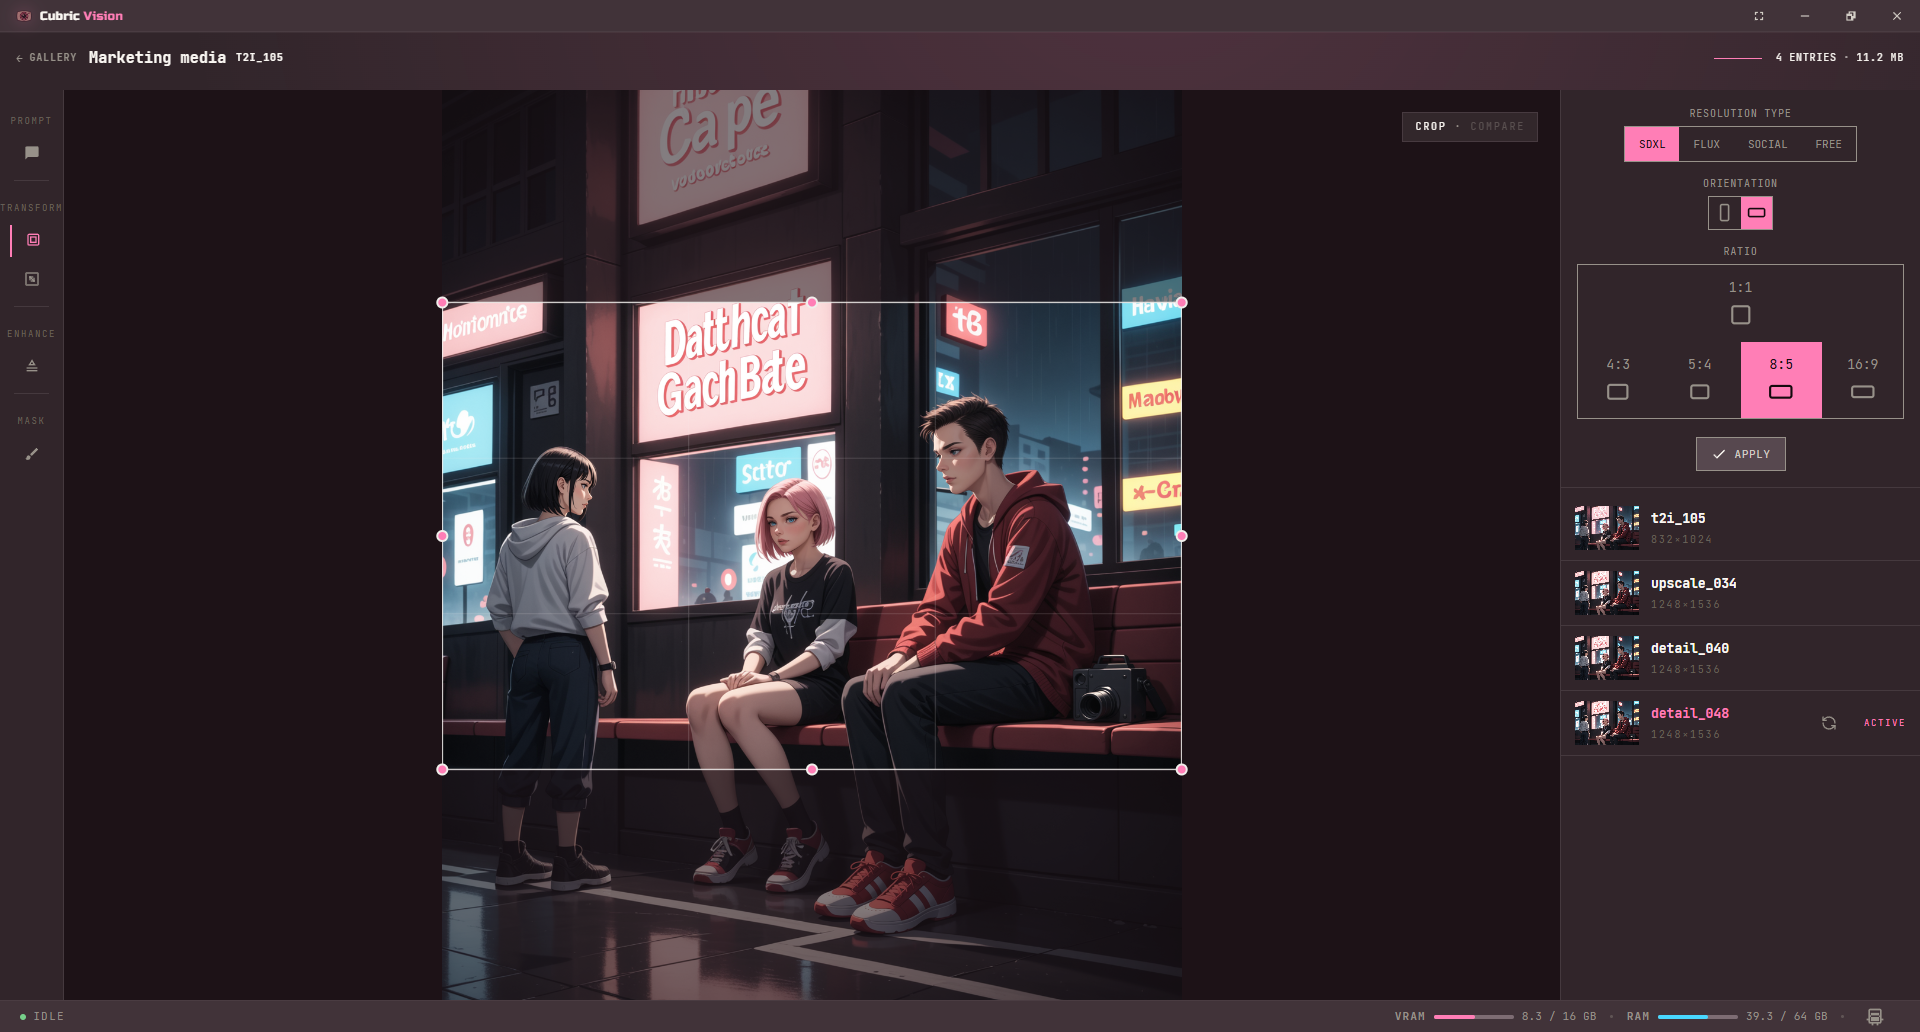
The crop box snaps to your image edges when it gets close, so you cannot accidentally leave a one-pixel sliver of border.

Image Crop tool with a crop box and ratio presets for SDXL, Flux, and social media formats
Preset ratios help you frame an image for model-friendly output sizes or social media formats.

Crop outside the image

The crop box does not stop at the edge of your image. Drag it past any side and the new area fills with the colour you pick in Fill outside. Turning a portrait into a landscape, or giving a subject room to breathe, starts here.

That flat colour is the point. It is what you hand to a model next: switch to a model with edit capabilities, mask nothing, and describe what should be there. The model paints into the coloured area.

Extending the box and the Resolution mode are image-only. Video crop cannot extend past the frame.

Cubric Vision crop tool with the crop box dragged well past the edges of the image and Fill outside set to black, then the filled black border, then the generated result with the model having painted the scene into it
Extend the box past the image, pick a fill colour, then hand the result to an edit model and describe what belongs there. Most models with edit capabilities can do this — the example uses Krea 2.

Resolution mode

Resolution is the third mode beside Ratio and Free. Type an exact width and height and the box locks to that shape; the result comes out at exactly those pixels. Ratio and Free select pixels and keep them as they are, so Resolution is the only crop mode that resamples.

Resize tool

Use Resize when you need a different output size without changing the image through a generative model. The preview updates once you finish typing a width or height and click away.

Original Size, under the width and height boxes, puts both back to the picture's own dimensions — so you can try a size, change your mind, and start again without looking the numbers up.

When ratio options are expanded, the settings panel can push the preview lower in the tool panel. Apply creates a new resized entry.
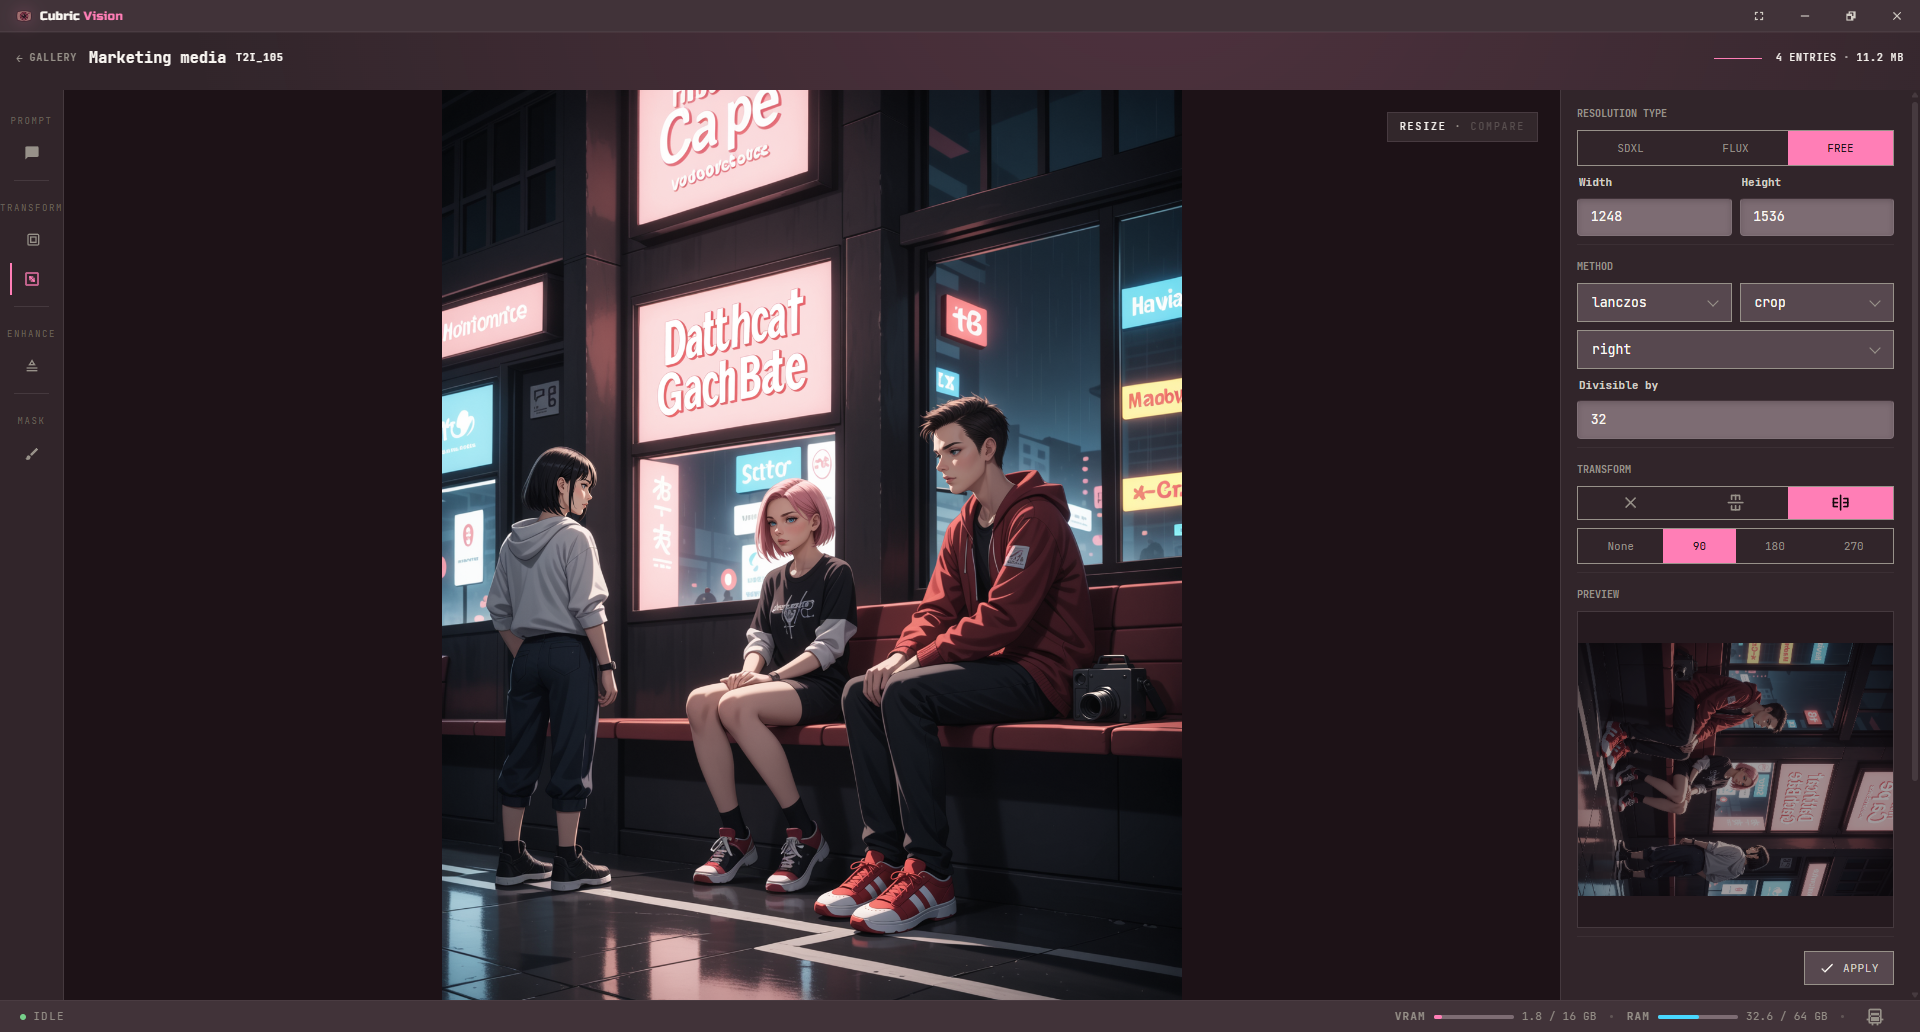
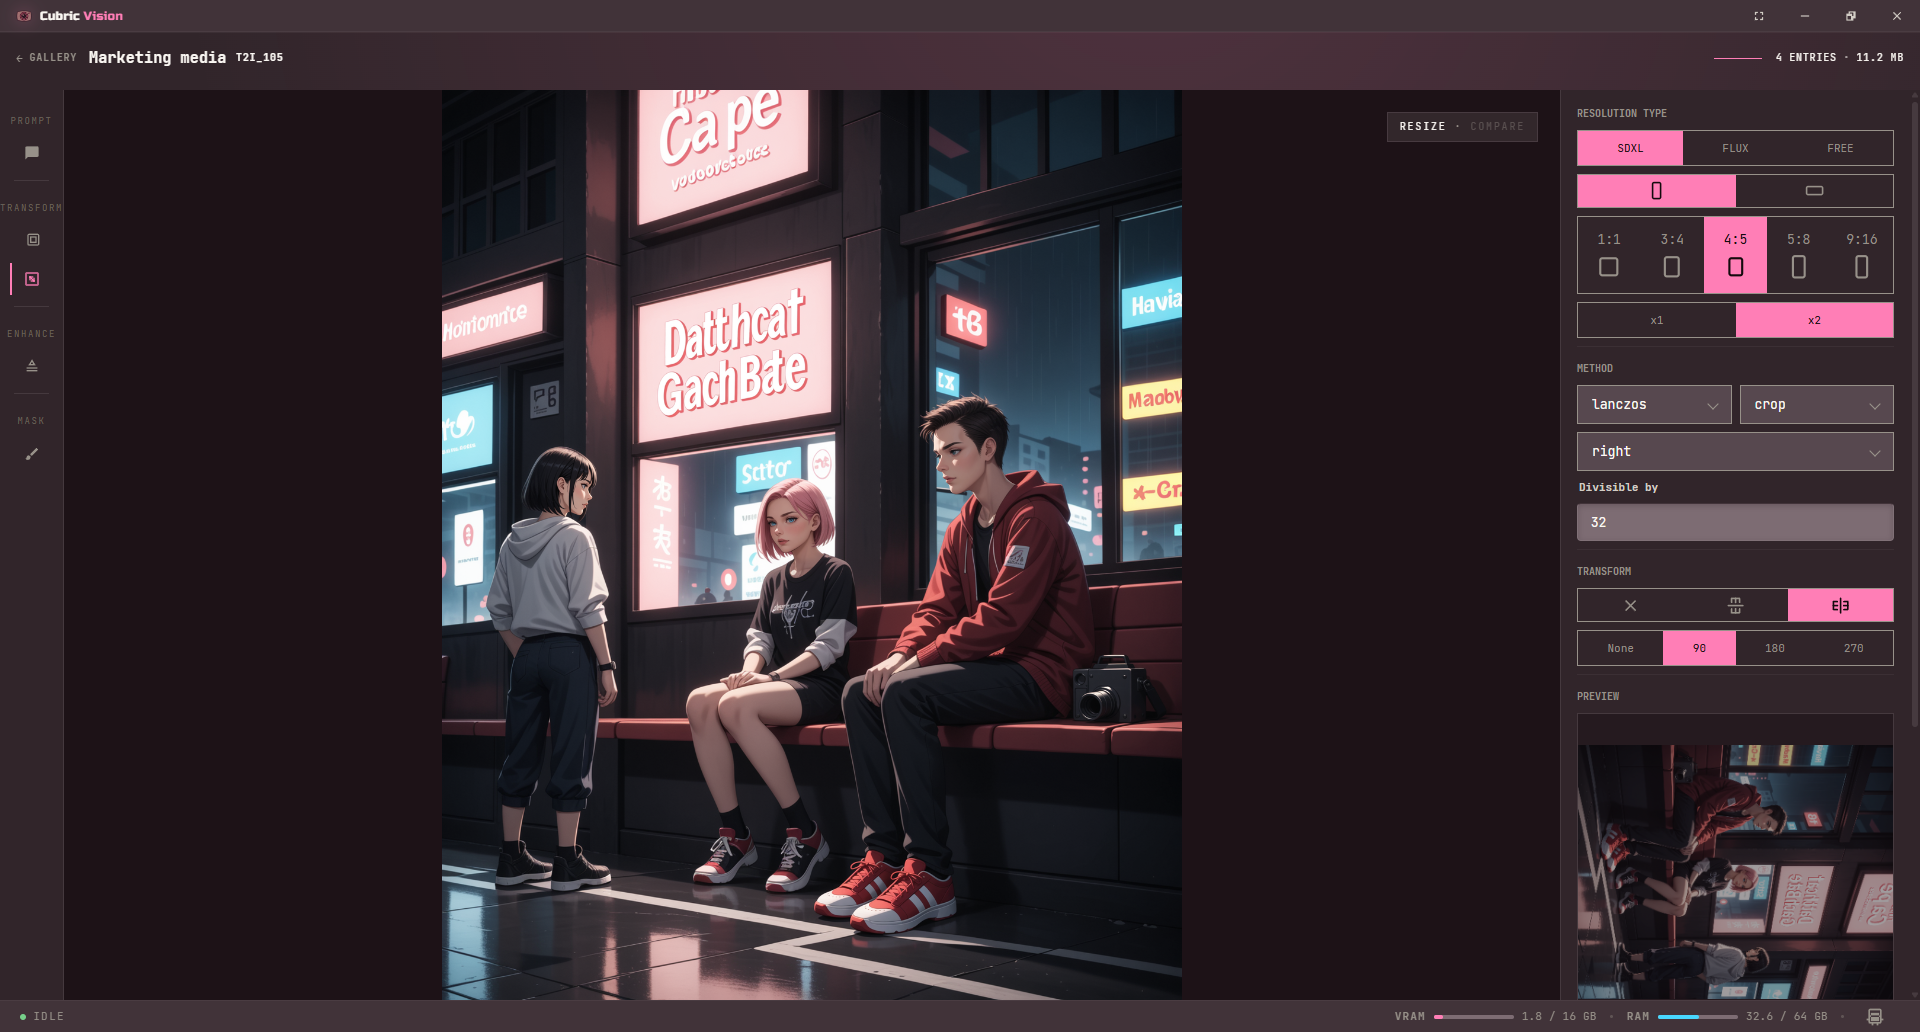
Image Resize tool showing width, height, scale, and a live preview of the resized image
The Resize preview updates while you adjust the settings.
Image Resize tool with ratio presets expanded and the live preview pushed lower in the settings panel
Ratio presets fill more of the panel, but the live preview remains available before you apply the resize.

Upscale tool

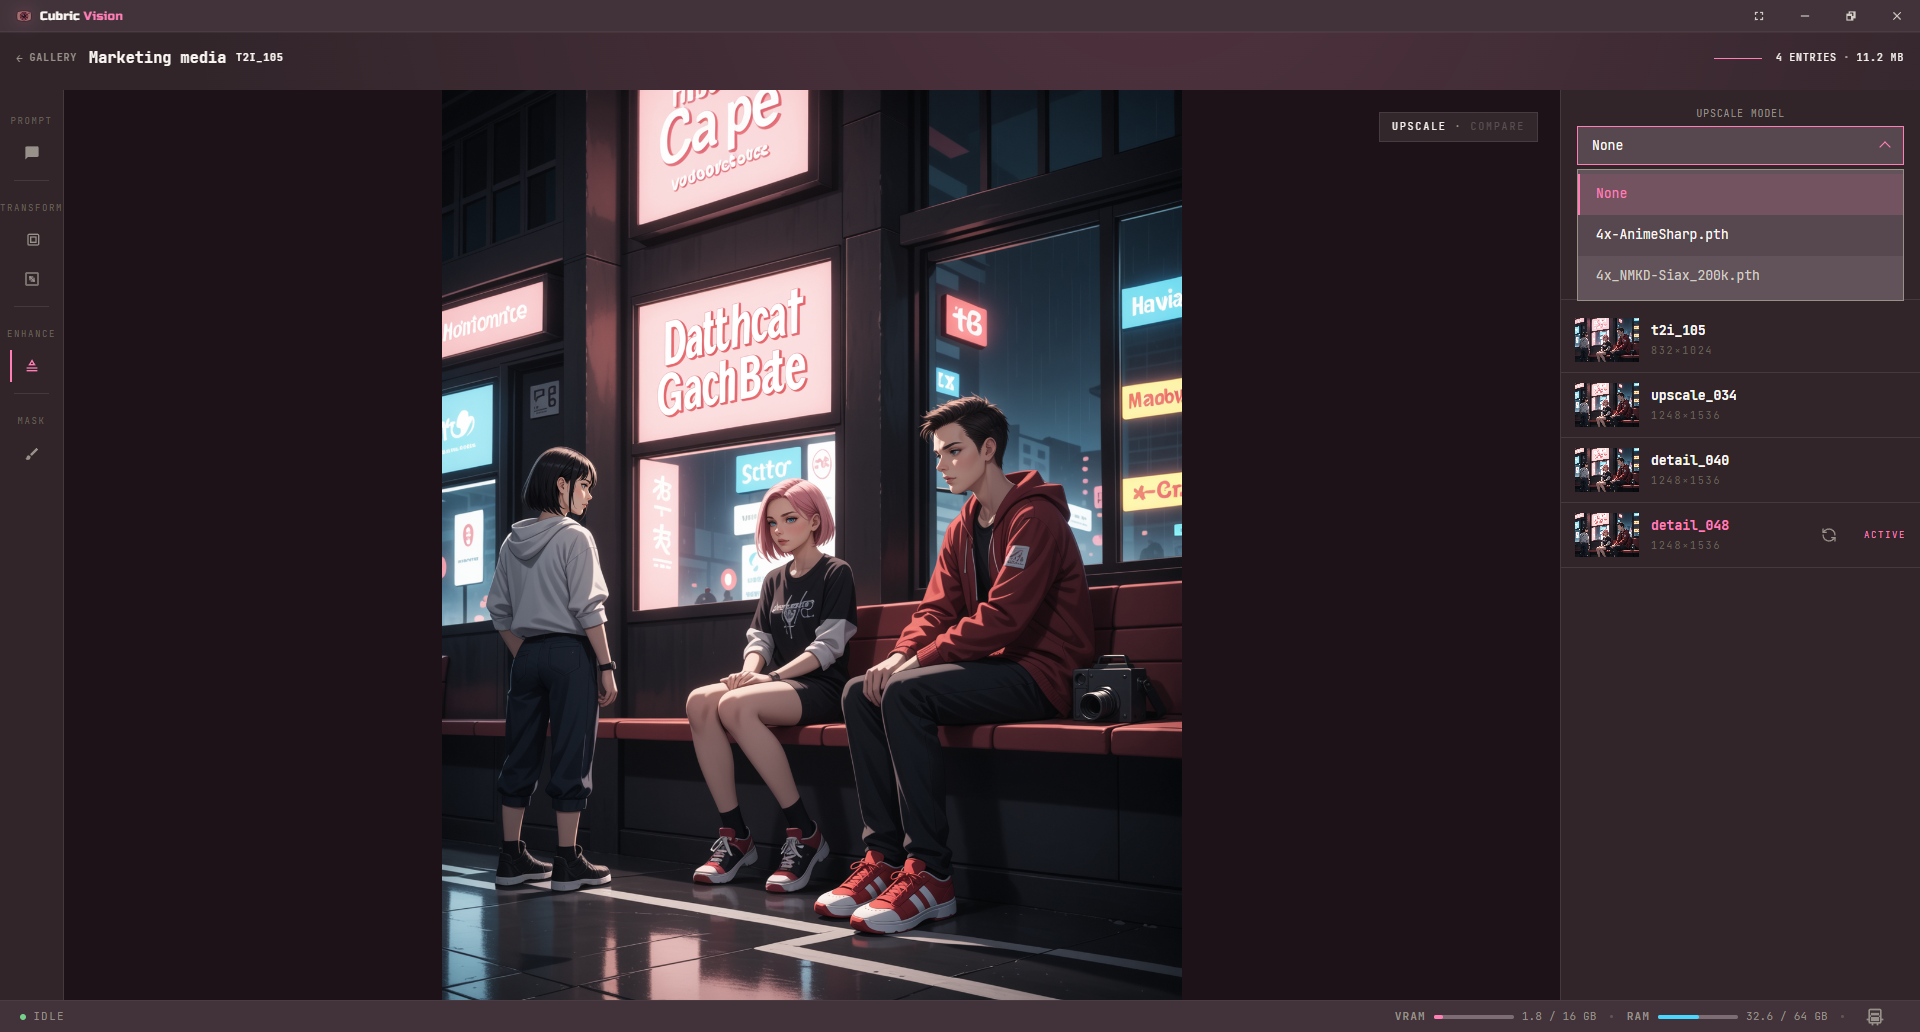
Use Upscale to enlarge the selected image. If no upscale model is selected, the tool behaves like a simple scale-up. If an upscale model is selected, Cubric Vision uses that model and can produce a better enlarged result depending on the model.

Applying the upscale creates a new image entry.
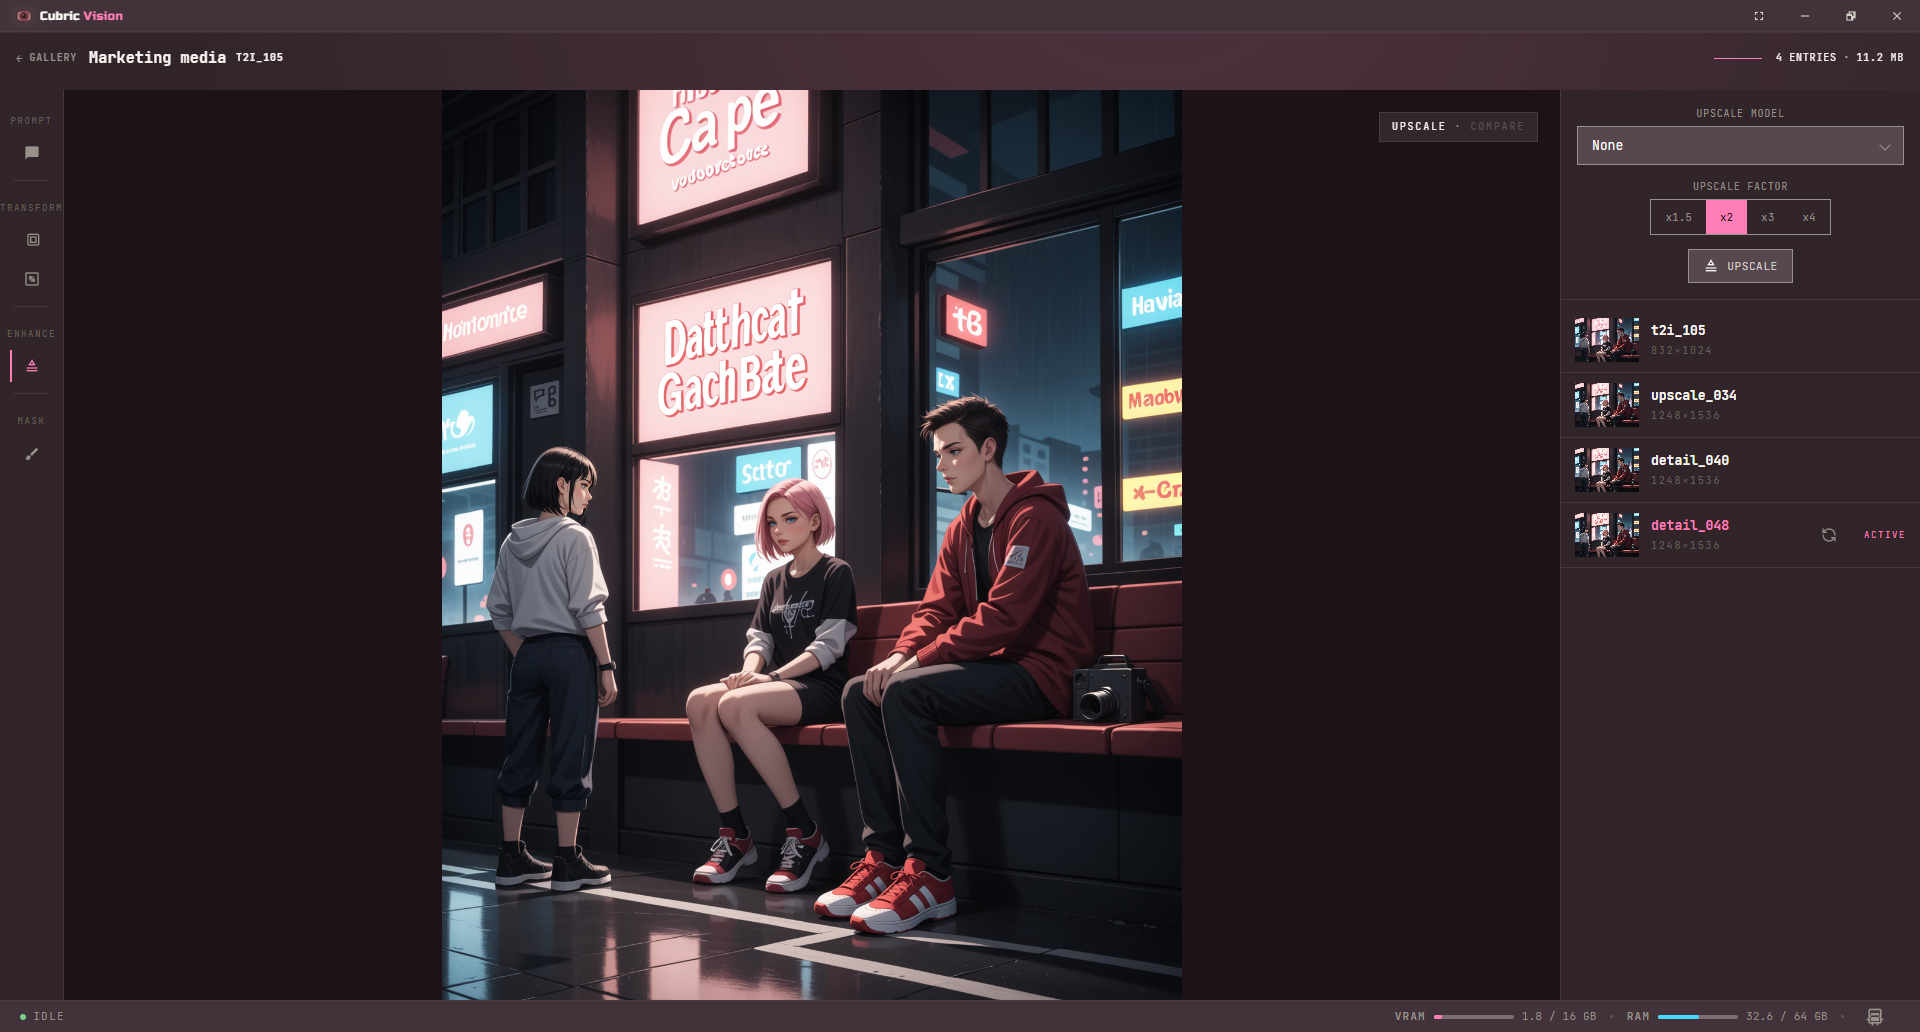
Image Upscale tool with upscale controls and no model selected
Without a selected model, Upscale performs a straightforward enlargement.
Image Upscale tool with an upscale model selected from the model dropdown
Selecting an upscale model routes the operation through that model for improved results when the model is suitable.

For a generative enlargement that invents real new detail, install the NVIDIA PiD Upscaler and run it from the Prompt Box. See Models for what it offers.

Remove Background

Remove Background is a History tool (Enhance) that cuts the subject out of an image using BiRefNet. Choose Transparent for a transparent PNG, or Color to fill the background with a solid color of your choice. Applying it creates a new image entry.

This removes the background, keeping the subject. To take an unwanted object out of a scene and leave the rest intact, mask it and use Inpaint with an empty prompt instead.

Cubric Vision Remove Background tool showing a before/after split of an image, with Transparent and Color background options and a color picker
Remove Background outputs a transparent PNG or a solid-color fill, previewed as a before/after split.

Latent previews

When an operation is running, Cubric Vision shows previews as intermediate frames come back from the engine. These help you see whether a long operation is moving in the right direction before the final result appears.
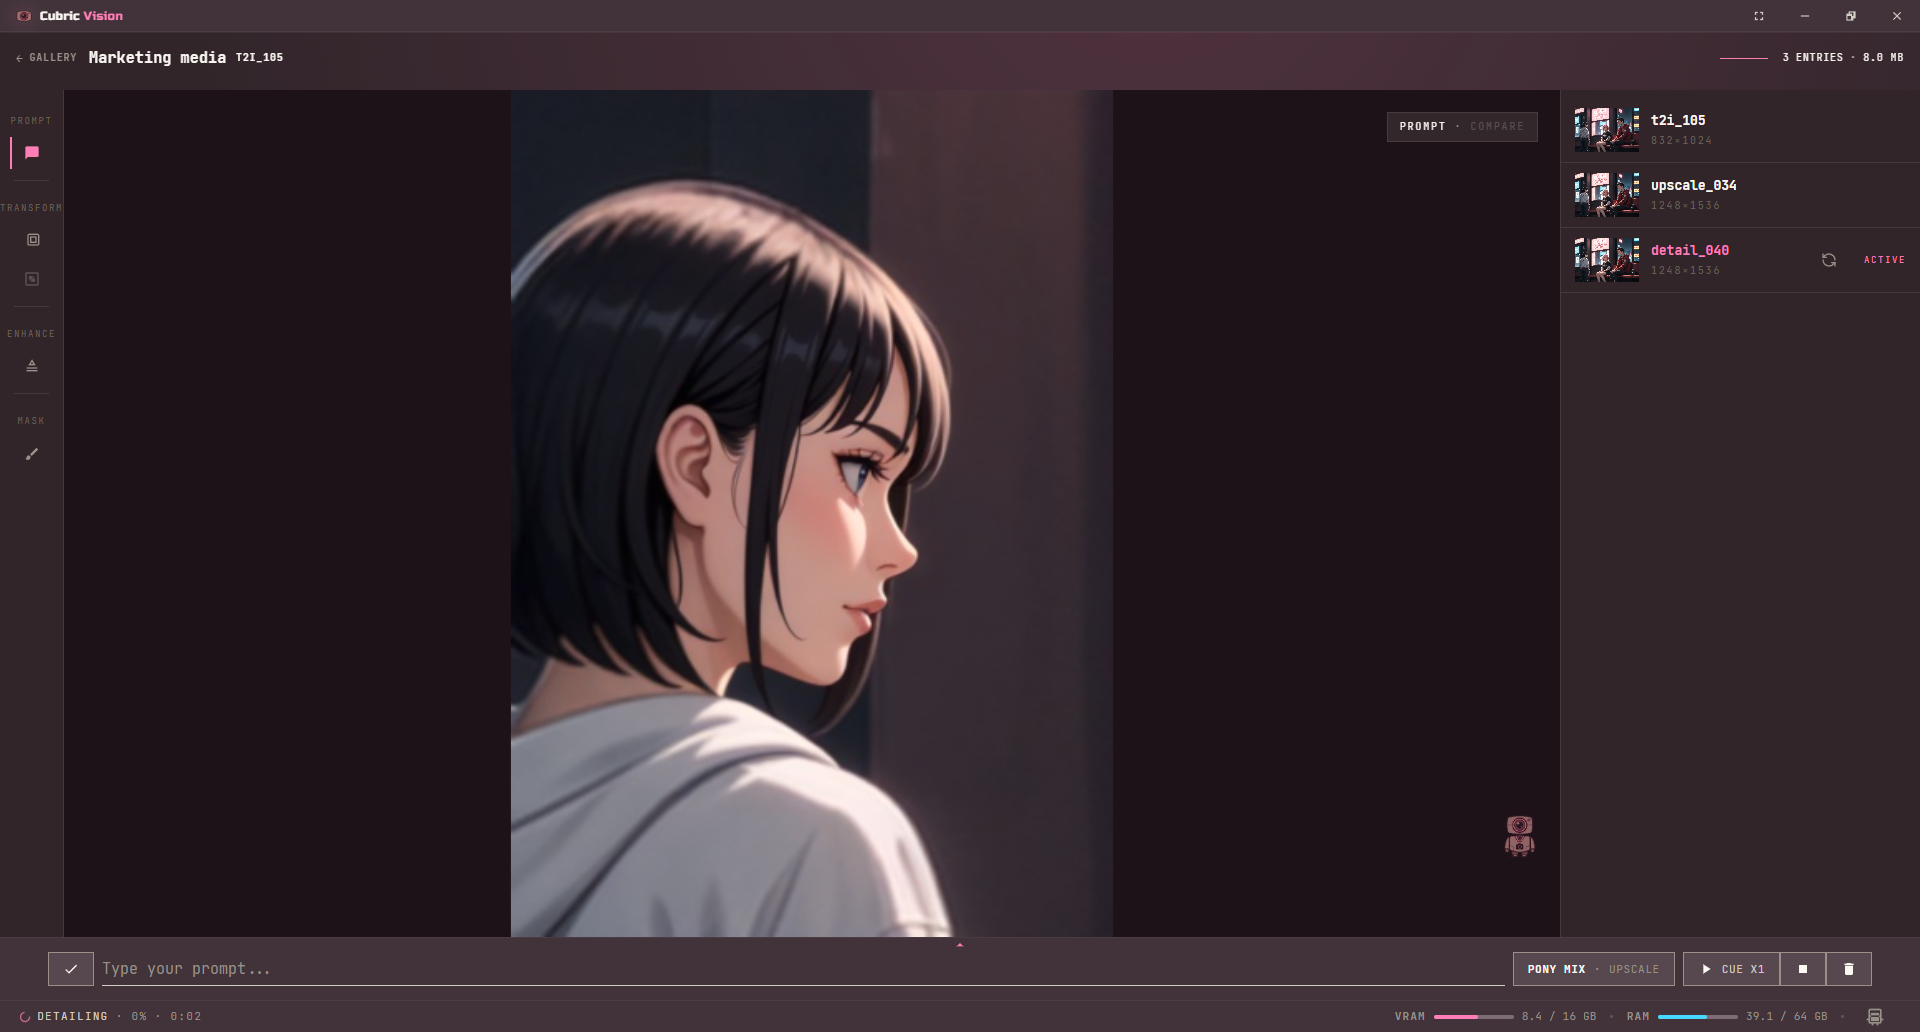
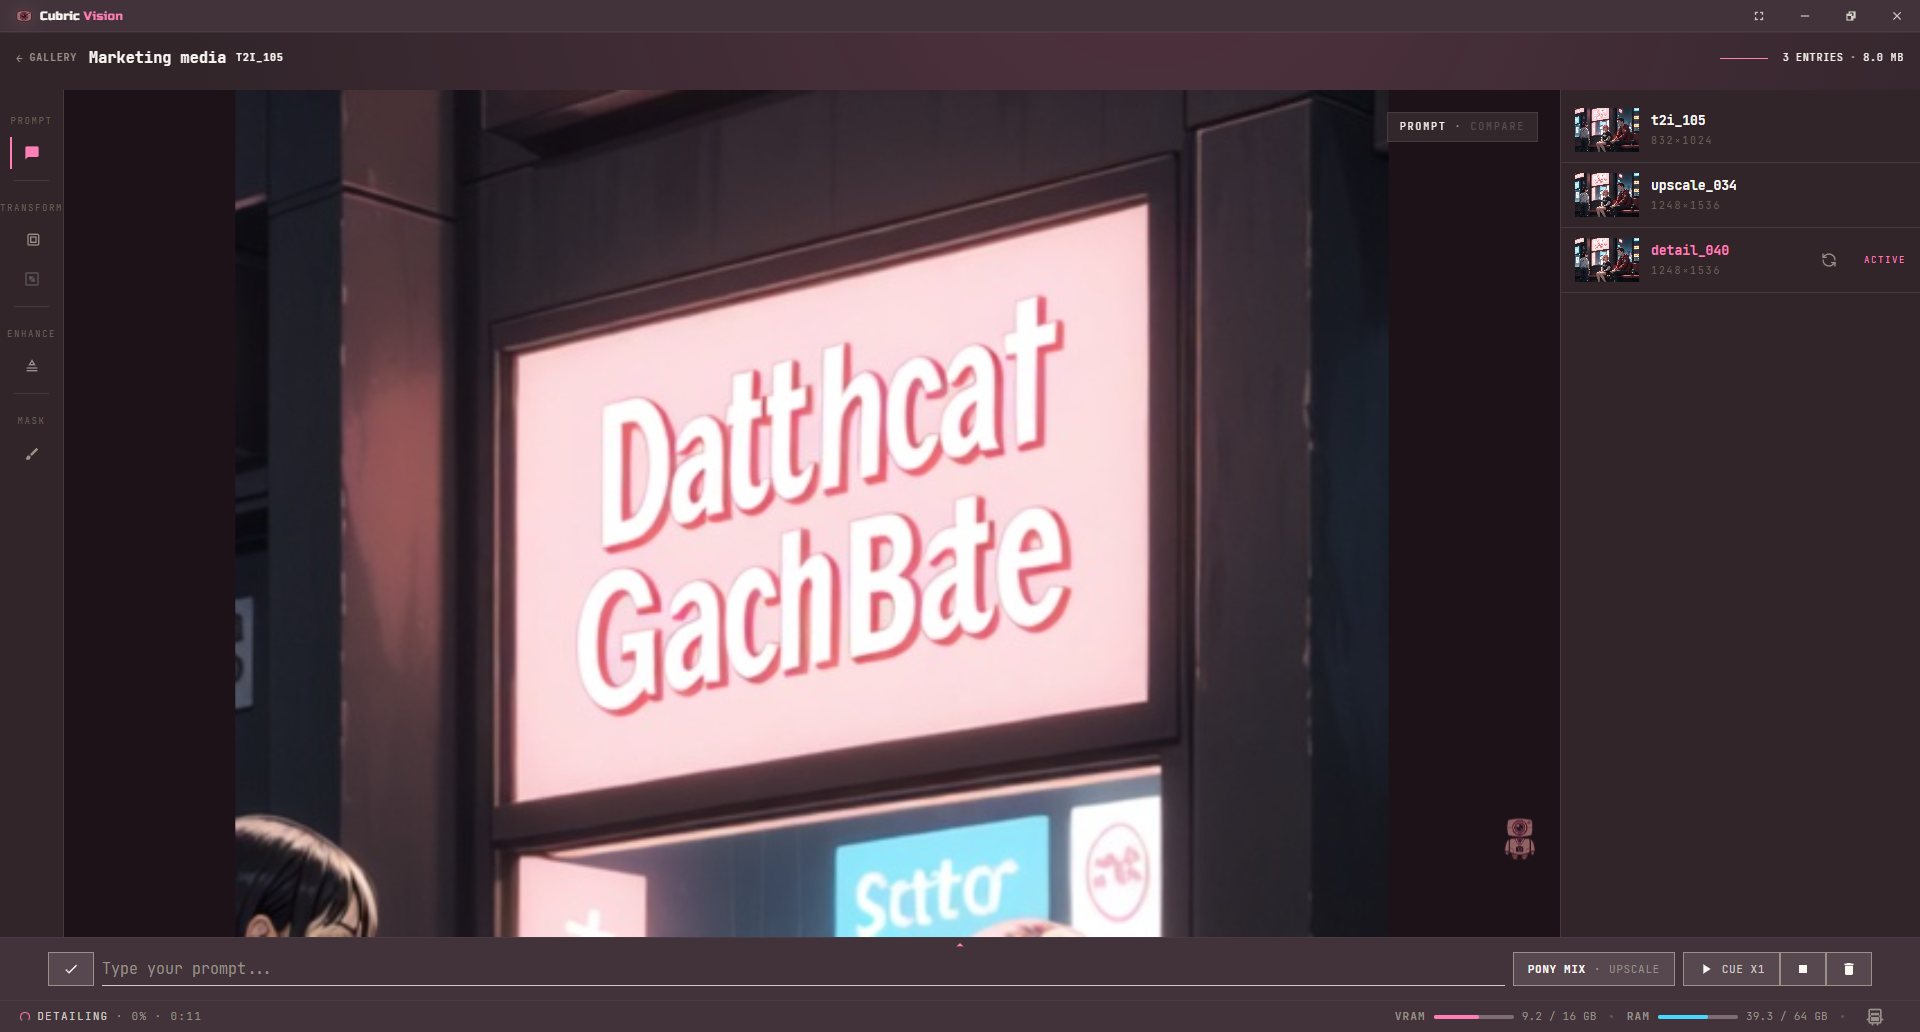
Most models now preview in real colour, on every platform. A few still show a rough colour projection on purpose — Krea 2, Qwen Image Edit, and Wan 2.2 share a preview decoder with a known upstream bug that corrupts the real generation, so the mediocre preview is the safe choice until that is fixed.

Video previews on MiniMax H3 and LTX 2.3 now play the actual clip in real colour as it refines, rather than coloured blocks.

History workspace showing an early latent preview during a masked image operation
Latent previews appear while the operation is still running.
History workspace showing a later latent preview during the same masked image operation
Later previews make it easier to judge whether the current operation should continue.

Common image operations

  • Text to Image. Create a base image from a prompt.
  • Image to Image. Rework an existing image while keeping some of its structure.
  • Control. Copy the structure of a reference image and paint your prompt into it. See Models.
  • Edit. Change what you describe and leave the rest. Mask first for a localised edit.
  • Detail. Repair or refine a selected region such as a face, hand, or object.
  • Inpaint. Regenerate a masked area, or erase what is under it with an empty prompt.
  • Upscale. Enlarge a chosen result for sharper output.