Getting Started
Choose where Cubric Studio generates, then set up the local engine or go straight into the app and connect a cloud GPU.
If you have not downloaded and extracted the app yet, start with Installation. This page picks up at the first launch, once Cubric Studio opens.
First launch
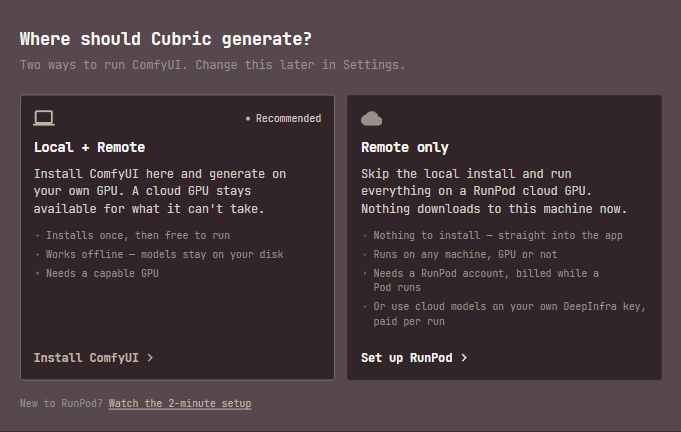
The first time Cubric Studio opens, it asks Where should Cubric generate? and offers two ways to run ComfyUI:
- Local + Remote (recommended). Install ComfyUI on this machine and generate on your own GPU, with a cloud GPU still available for what your card cannot take. It installs once and is then free to run, works offline with your models kept on your disk, and needs a capable GPU.
- Remote only. Skip the local install and run everything on a RunPod cloud GPU. Nothing downloads to this machine, it runs on any computer with or without a GPU, and it needs a RunPod account, billed while a Pod runs. Or skip RunPod too and use cloud models on your own DeepInfra key, paid per run. See Remote only below.
New to RunPod? Watch the 2-minute setup, under the two cards, opens the setup video. You can change this choice later from the Remote panel, next to Settings: see Remote only below.
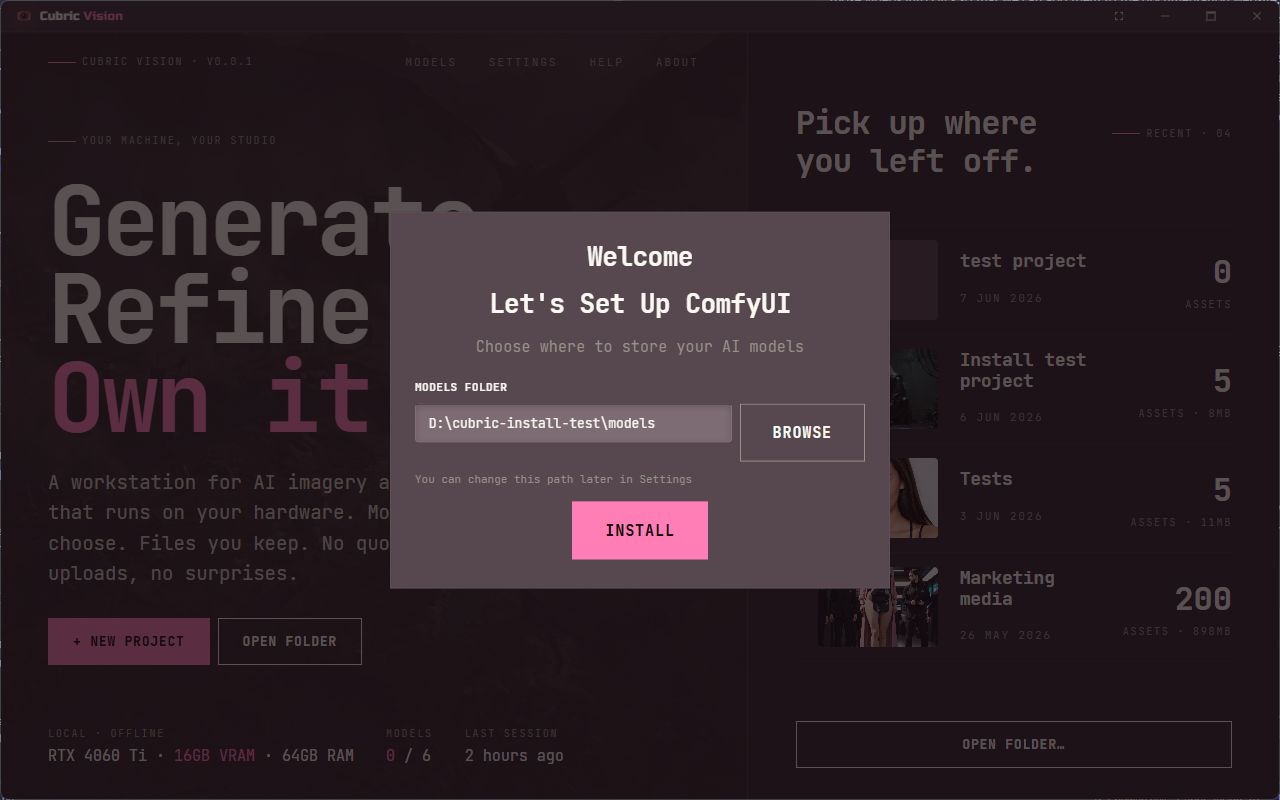
Local + Remote: choose where models live
Choose Local + Remote and the next screen, Install ComfyUI, asks for a models folder. Pick a drive or folder with room to grow — models are large, and they stay on your disk. Leave the field empty to use the default folder. Back returns you to the choice; nothing is committed until you press Install.
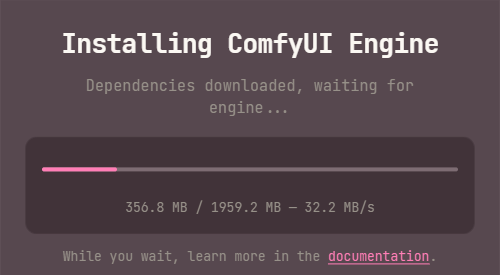
Press Install to start setup. Cubric Studio downloads and prepares the ComfyUI engine, installs required custom nodes, and installs the base files needed for built-in workflows. This can take a while, especially on the first run.
One step, installing the engine's Python packages, runs only on this first start and can take several minutes of near-silence. The progress screen now names it, Installing Python packages... / First engine start only, so that quiet stretch no longer looks like a frozen install.
macOS — install Apple's Command Line Tools first
Setting up the local engine needs git, which on macOS only arrives with the Xcode Command Line Tools, and a clean Mac does not have them. The first Install press stops with a message naming exactly that.
- Open Terminal.
- Run
xcode-select --installand let Apple's download finish. - Press Retry in Cubric Studio.
This is a known issue, not a fault in your download. Windows ships a prebuilt engine and never needs git; macOS and Linux build theirs. Removing the requirement is being worked on.
No GPU? Choose Remote only
Choose Remote only and Cubric skips the ComfyUI install entirely and takes you straight into the app. Nothing is downloaded to your machine, and nothing starts billing until you connect a Pod yourself: press Remote next to Settings in the top navigation, save your RunPod API key under RunPod remote engine, and press Connect.
You do not need RunPod at all to start. With no engine, your projects still open, and cloud models run on your own DeepInfra key, paid per run: see Getting a DeepInfra key. Anything that needs ComfyUI says so, and points you to connecting a Pod or installing the local engine.
It is reversible. Remote only switches on Skip the local engine install, under RunPod remote engine. Turn it off and Cubric asks to install the local engine on the next launch; the toggle also clears itself automatically once a local engine is actually present, so you can no longer be left skipping an engine you already have.
Models and folders
After setup finishes, Cubric Studio opens to the Projects page. Model files live separately from your projects. You can change the ComfyUI models path, add extra LoRA and upscale model folders, and bring your own LoRA later in Settings → External connections.
Model and download sizes are shown in decimal gigabytes (1 GB = 1,000,000,000 bytes), the same convention RunPod and Hugging Face use. Windows Explorer's file properties use binary units under the same "GB" label, so it reports about 7% smaller for the same file.
Some models share the same required files. Once one is installed, another model that uses those files shows how much of it is already on disk, so installing it later only downloads what is missing. See Installing models.
Settings
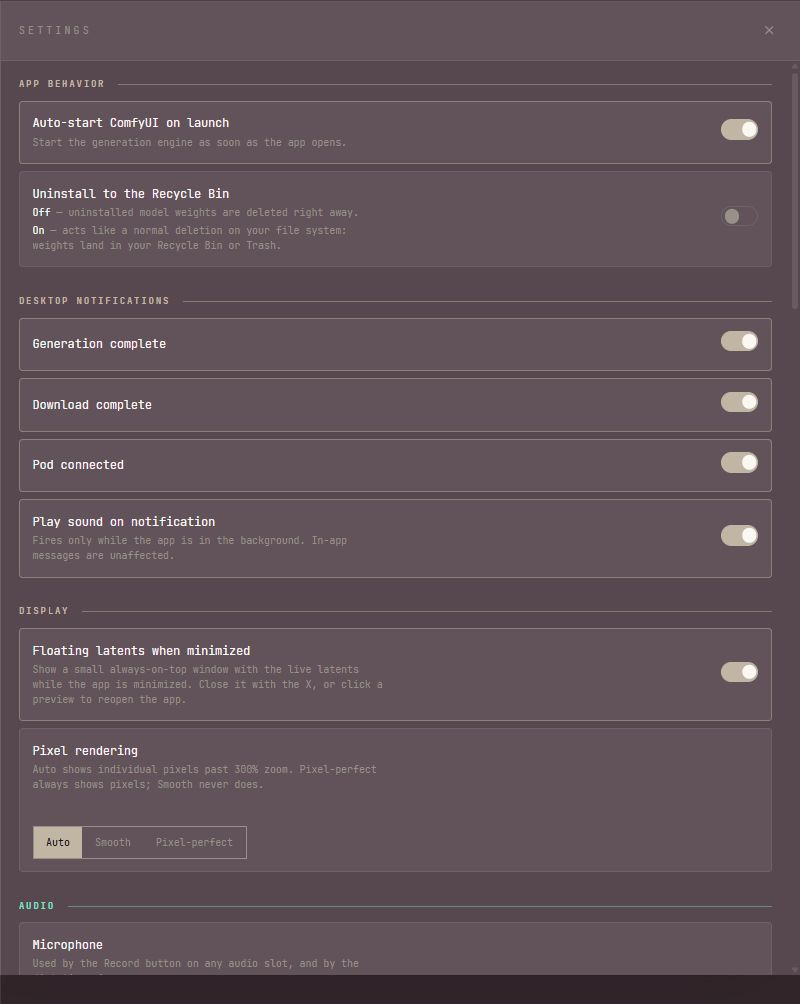
Everything else, engine startup, desktop notifications, viewer rendering, audio and dictation, what Reuse Prompt copies, and connecting an AI agent, lives on the Settings page. Language models and the optional RunPod remote engine have their own Remote panel, right next to Settings in the top navigation, documented on the Remote page.
Engine updates
The generation engine updates with the app, and since 1.4 it updates in place: only the parts that moved are replaced, so a typical engine update finishes in seconds and costs almost no bandwidth. It used to delete the whole engine and fetch it again — around eleven gigabytes — even when the change was tiny.
The full reinstall still exists and still runs by itself when an update genuinely needs one, so you never end up on a half-updated engine.
What to expect
The first setup is the slowest run because Cubric Studio is preparing the local engine and downloading required files. Later launches use the installed engine and models from disk.
You no longer need to close your own ComfyUI before opening Cubric Studio — the app's engine runs on its own port and stays out of the way of yours.
If your graphics driver is too old for the engine, Cubric Studio refuses to start it and says so, naming which NVIDIA driver version to install and where to get it, instead of crashing without explanation.
Model downloads also work with antivirus HTTPS scanning turned on (Kaspersky, ESET, Avast, Bitdefender): Cubric Studio now trusts the same certificates your computer does, so a download no longer fails with a certificate error while your browser works fine.