Projects
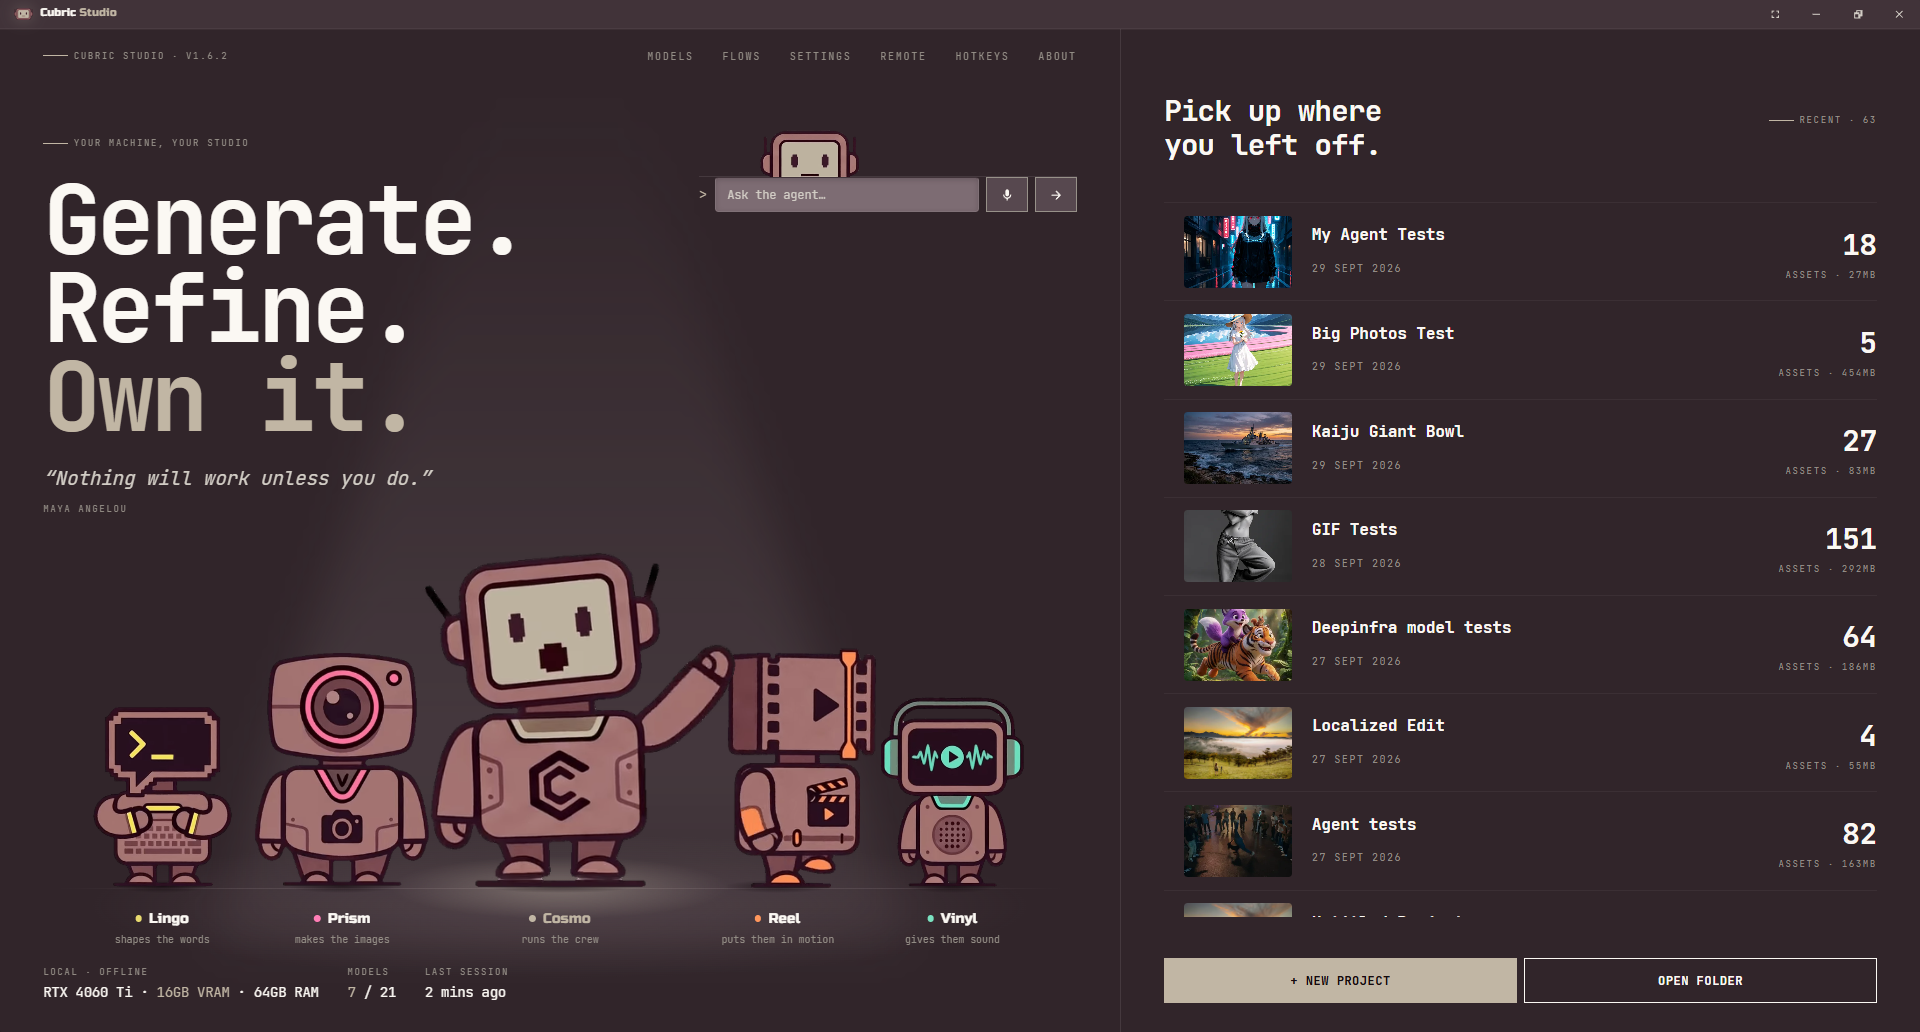
The Projects page is the landing page for Cubric Studio. Create new work here, reopen existing projects, or drop a project folder back into the app.
Project folders
A project folder carries the project settings, generation history, media records, and image or video assets for that workspace. You can use projects as reusable templates or share them with another Cubric Studio user.
Installed models live separately from the project folder. Sharing a project gives another user the project structure and saved work, but they still need the required models installed on their own machine.
Creating a project
Click + New project, enter a project name, and optionally choose a project location. If you leave the location blank, Cubric Studio creates the project in your Documents folder under Cubric Studio/Projects. On your first launch of 2.0, Cubric Studio renames your existing Documents/Cubric Vision folder to Documents/Cubric Studio for you; your projects keep working and there is nothing to do.
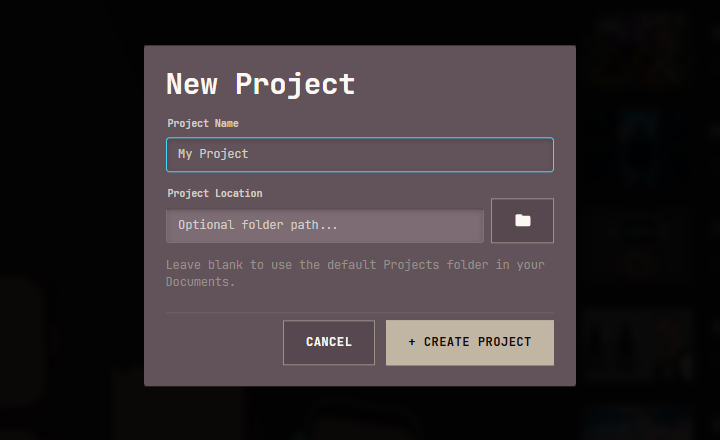
When you press Create Project, Cubric Studio creates the project folder and opens the new project in the Gallery workspace.
Loading a project
Click a project row to open it. You can also drag a project folder onto the Projects page, or click Open folder to choose an existing project folder from disk.
Renaming or moving a project's folder on disk, in Explorer or Finder rather than through Cubric Studio, no longer breaks it: the next time you open it, Cubric Studio notices the media has moved with it and keeps the gallery intact.
Project context menu
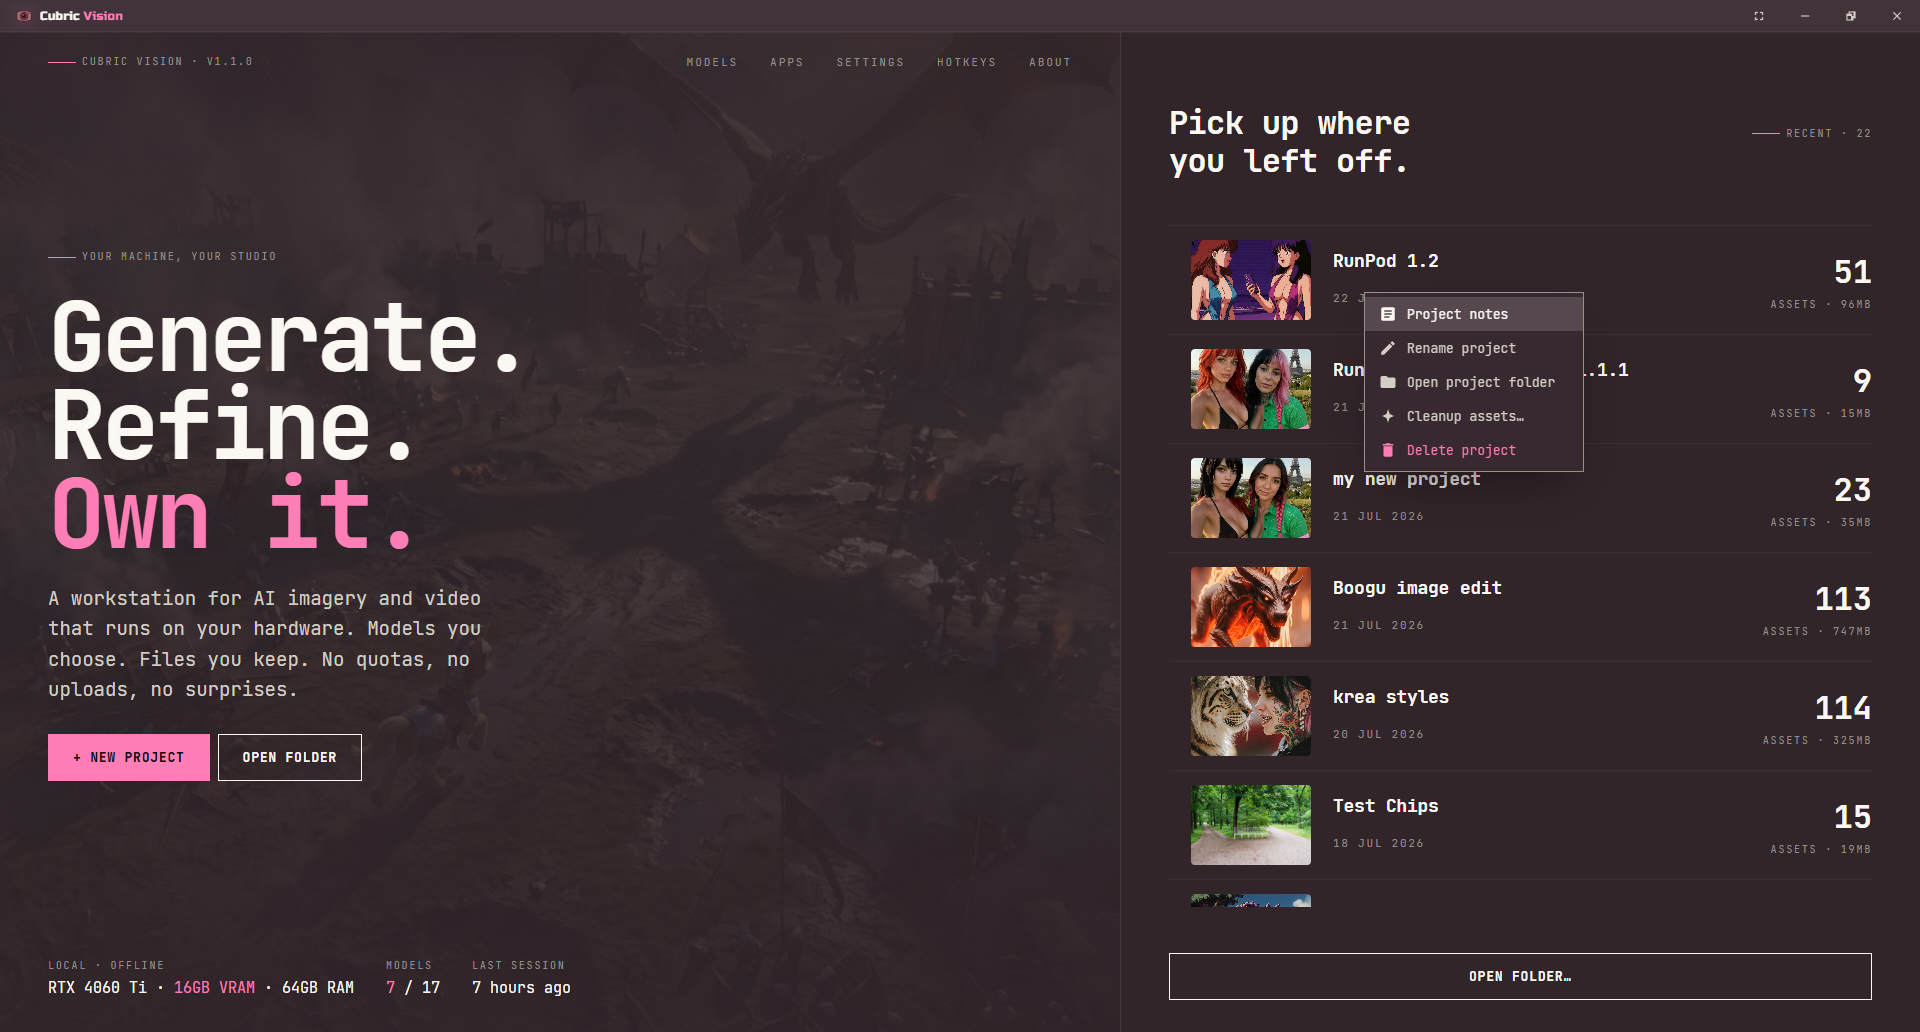
Right-click a project row on the Projects screen for its actions:
- Project notes. Add or edit notes attached to the project. Notes are markdown and read formatted, in the same window as Card notes.
- Rename project. Change the project's display name.
- Open project folder. Reveal the project folder in your file browser.
- Cleanup assets… Slim the project down before you back it up or share it. This clears the thumbnails and video previews Cubric Studio generates, which rebuild automatically the next time you open the project, plus the cached copies of inputs kept for Reuse Prompt. Your generated media and history are kept, but Reuse Prompt can no longer bring back an input this clears unless the source card is still there.
- Delete project. Remove the project, with an option to delete its files (see below).
Deleting projects
Right-click a project row to open its context menu, then choose Delete project. Cubric Studio asks for confirmation and includes an Also delete files from disk option so you can decide whether the project folder should be removed from your drive.
The landing page
Five Cubric mascots, Lingo, Prism, Cosmo, Reel, and Vinyl, stand on a lit stage across the bottom of the Projects landing page, under a rotating quote. Hover one to have it greet you; click one for a happy pose. They step aside while a RunPod GPU is connecting, and Cosmo takes the stage alone until it is ready.
The landing page's top bar also carries a Flows link, the same Flow Library shortcut as the Flows button in the Gallery, alongside Models, Settings, Remote, Hotkeys, and About.